
VPN stands for ‘Virtual Private Network’. As the term itself is quite self-descriptive, we can only say that with rapidly increasing internet traffic our data is becoming more at risk by the day and since we cannot diminish the use and importance of the internet in our lives, it should be our top priority to secure our data and information.
In this day and age, pretty much everyone owns a personal cell phone or an Android device of some kind. These devices are the core of a lot of our sensitive information. So, by making them secure, we can protect our data and information to a great extent.
This can be done by installing a VPN on our devices which helps to encrypt all the data passing through your PC, smartphones and VPN servers. Also, it camouflages your current location and diverts the trackers to a remote location server, which in other words, makes you untraceable.
This is done by installing a trusted VPN service from the Google Play Store.
Setting up a VPN on an Android Device
- Search for a credible VPN Service from the Play Store or look for the link provided by your chosen VPN service.
- Make sure to read the user reviews to validate the application before installing it,
- Also, give a good read to the required permissions of the app. ‘WiFi Settings’ are needed to be accessed by every VPN app, make sure no other permissions are asked for. Press ‘Accept’ and proceed.
- The download will start followed by its installation on your device. Once completed, initiate the app and provide the credentials required. Once signed in, choose the server you wish to connect to and press ‘Connect’.
Setting up with OpenVPN
Since OpenVPN is the most prescribed protocol, due to its speed and security balance we will proceed with it.
- First, you need to download the Ovpn file provided by the VPN Server. Unzip if required and transfer in a folder on the device.
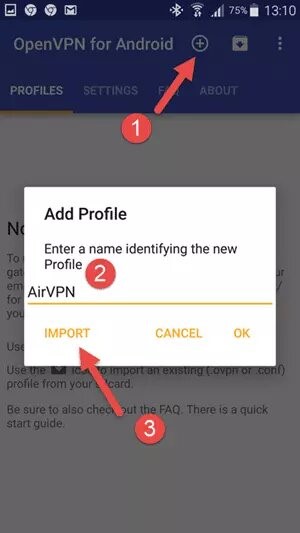
- Install and run OpenVPN on Android. Click the ‘+’ button to Add Profile on the top right corner of the screen. Provide a name for the profile and press ‘Import’.
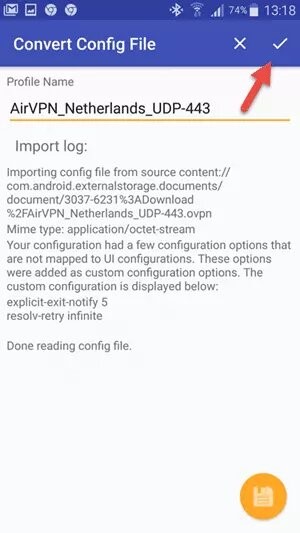
- Steer to the folder containing the unzipped file, select the server (.ovpn file). Wait for the file to be imported completely then press the Check icon to proceed.
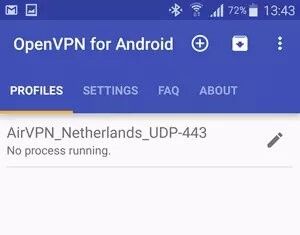
- Next, the profile’s name will appear on the screen. Touch it to begin the VPN Service. More than one server files can be displayed on this page.
Most of the time all required keys and information is provided in the customized .ovpn files and no further configuration is required. But other times one has to provide the account information and other details. For such instructions, going through the provider’s documentation can be useful.
Recommended Additional OVPN for Android Settings
Enable IPv6 Routing
Ipv6 DNS Leaks can be prevented by configuring OpenVPN on Android by following these steps:
- In the ‘Profiles’ tab edit the specific VPN Connection.
- Check IPv6 use the default route. Also, make sure IPv4 leak protection should be enabled ( by default).
Downloading the Android .apk File
De-Googling your Android device can prove to be useful in this case. Most VPNs provides an .apk file to sideload to Android. Since sideloading from outside the Play Store can dispense certain risks of running malware on your PC, it is beneficial to use a reputable source for the .apk file.
- Android File Manager app should be downloaded.
- Download or transfer the .apk file to the device.
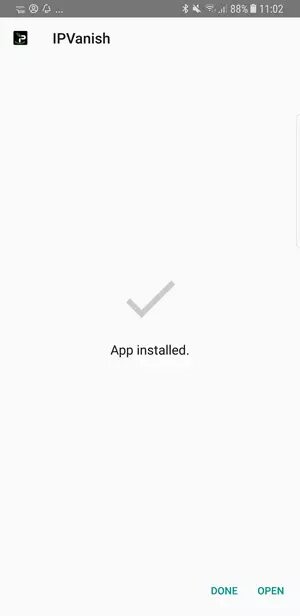
- Search the file using a file explorer and press ‘Install’
- Wait for the installation to complete then open it.
Configuring PPTP or L2TP/IPsec VPN Setting manually
Some people still prefer to use PPTP or L2TP/IPsec connection as it eliminates the need to download a third-party app. Since the android devices already have a VPN Client that supports PPTP and L2TP/IPsec protocols.
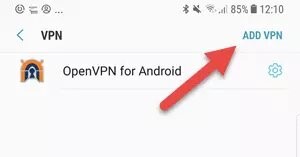
- Advance to your VPN Settings page. Settings > Connections > More Connection Settings > VPN. Choose ‘Add VPN’.
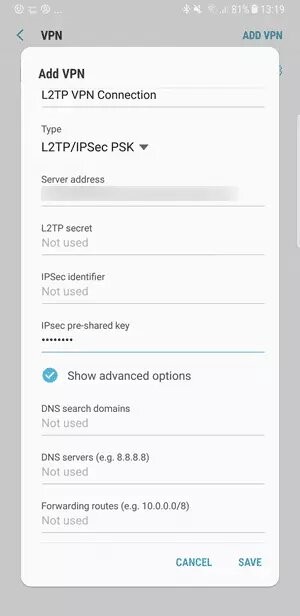
- Provide the PPTP or L2TP Settings given by the provider (available on the website’s setup page). Press ‘Save’ when done.
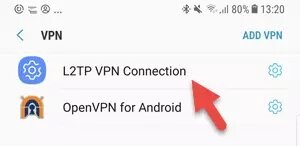
- Select the recently made connection on the VPN Settings page.
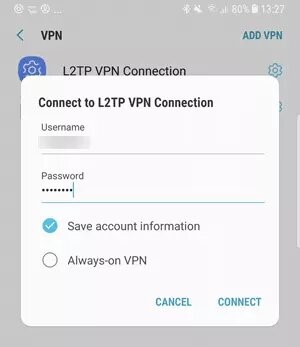
- Sign in to your VPN account and choose ‘Connect’.
Testing your VPN
Android shows a small key icon in the notification tab whenever the VPN is connected, irrespective of the kind of VPN you use, confirming that you are protected.

To test further run an IP Leak test.
Checking VPN for IP Leaks
Android is not as vulnerable as desktop platforms to WebRTC and DNS Leaks. But users should still always check or IP Leaks once connected.
Also, keep in mind that Private-Use – [RFCXXXX} IPs are local and hence are not used to identify a device or individual and cannot account for an IP leak.
Enabling a Kill Switch
A built-in kill switch comes with the newer versions of android including built-in PPTP/L2TP app, OpenVPN for Android and custom apps, for newer versions use the following steps:
- Turn off the VPN. Proceed to the device’s settings.
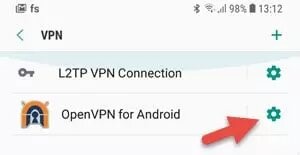
- Settings > Connections > More Connection Settings > VPN.
- Set a kill switch on the gear icon next to the app or connection you want it for.
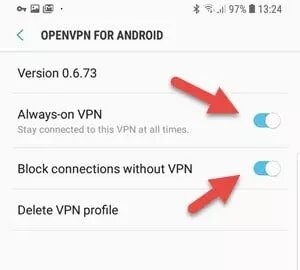
- Turn on ‘Always-on VPN’ and block connections without.
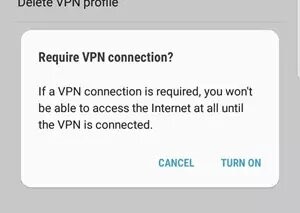
- Confirm you want a kill switch or your VPN.
For older versions of Android, you can still configure OpenVPN for Android to perform as a kill switch.
- In the ‘Profiles’ tab edit the specific connection.
- Steer to the ‘Advanced’ tab and check “Persistent Tun’ and set ‘Connection retires’ to unlimited.
Open VPN kill switch or Android is now active.
The back and forth handling of data transfer to the remote servers can deteriorate the speed of your work as it adds a step in the overall browsing process. Getting a VPN doesn’t guarantee 100% protection, but it is much better than using nothing at all.